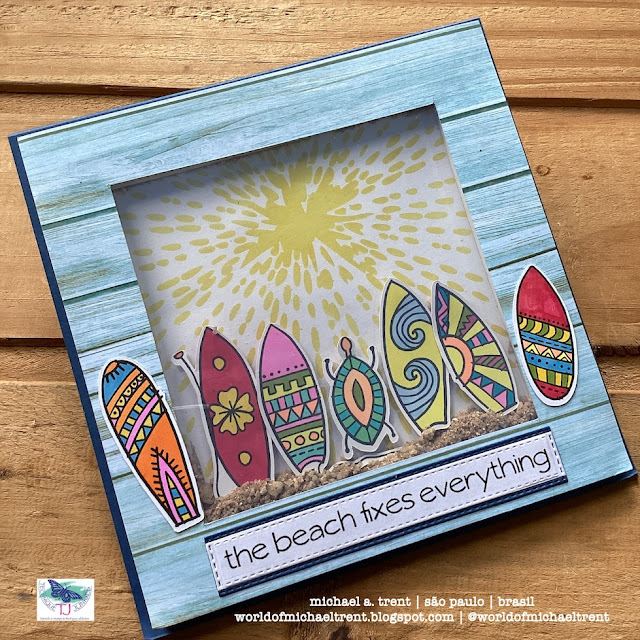
Let's "Hang 10" at the Beach | Square Shaker Card | Technique Junkies Stamps
Hello everyone and welcome to July. The July 4th holiday is over but summer is in full swing, and it's the perfect time to make this fun, square, shaker card. Once again I used my favorite new rubber stamp - Hang 10 - from Technique Junkies. This is such a great background stamp, is so much fun to color, and, my Scan N Cut has no problem cutting all of these boards out with ease. :-)
So, how did I make this card?
First, the easy parts.
- I made a top-folding 6" square card using dark blue cardstock.
- I cut a piece of white cardstock, 5.75" x 5.75" (for the inside).
- I stamped Smell the Sea on white cardstock, die-cut it using a fishtail die, and then die-cut a piece of the same blue cardstock using the next larger fishtail die.
- I cut a piece of decorative paper 5.75" x 5.75"
Next...
- I adhered the Smell the Sea sentiment to the blue layer, trimmed a bit off the top and bottom, and adhered it to the white cardstock.
- I adhered the full white cardstock piece to the inside of the card.
Next...you will need a pencil, ruler, craft knife, and a piece of acetate.
- I turned the decorative paper over, used a pencil to mark 7/8" in on all 4 sides, used a ruler to draw lines, and then cut out the center of the piece.
- I applied 3/8" score tape around the 4 sides of the window, cut a piece of acetate 5" x 5", and adhered it covering the window I cut.
Next...
- I cut 4 strips of foam tape and adhered it around the back of the decorative paper. The "foam tape" I used is actually weather stripping I found here but it works perfectly and it's so much cheaper. Depending on your foam tape, you might need 2 layers.
Set this aside and let's work on the inside of the card.
- I cut a piece of white cardstock 5.5" x 5.5".
- I placed the Mini Burst Stencil from TCW on top of the white cardstock and used a craft brush to apply mustard seed distress ink over the stencil.
- I stamped Hang 10 and colored in the surfboards. Then I used my Scan N Cut to cut them out with a small border. Fussy-cutting them would also be super easy.
- I arranged the surfboards along the bottom, making sure they were inside the window piece, and adhered them using small foam squares.
Now...
- Add a little sand at the bottom of your front piece with the acetate - you do not want too much - just enough to cover the bottom of the boards a bit.Now the glue - some foam tapes have an adhesive backing. If yours does, remove the tape backing and then adhere the surfboards down on top making sure to center the piece.If your foam tape does not have a tape backing, add white glue to your foam tape and then adhere the surfboards down on top.
- After giving the glue a few seconds to set, I turned it over, made sure my scene was centered and there were no areas for the sand to come out. Then I put a book on top and let it dry completely.
- Once fully dry, I adhered this to my card front, added two more surfboards - one on each side - to expand the scene.
- Lastly, I stamped The Beach Fixes Everything on white cardstock, die-cut it with a banner die, and layered it on the dark blue cardstock that had also been die-cut with a banner die.
Here is the final card front and inside.
I know this seems like a lot of work for 1 card but, if you are making it for someone special, or as home decor, it's totally worth it in the end.
If you love these stamps - all from Technique Junkies - you can save 10% on your order by using my Design Team Discount Code at checkout - TJ10Michael.
I'd love to know your thoughts on this card - please, leave a comment below. Try to stay cool this weekend. Until next time...
Hugs from Brasil.
~Michael


.jpeg)
.jpeg)
This is amazing Michael! I can almost smell the seashore!
ReplyDelete