Sunday, June 30, 2019

It's Coffee and Cupcakes With Deb and Celeste Day


Hello...Hello....Hello.....everyone.  Yes, I am in a good mood today.  That's because I was asked to have "cyber" coffee with my friends Deb and Celeste again and the theme is "anything goes".  This time I am bringing cupcakes.  Well, a cupcake card that it is.

Before I get to the card let's talk about today's choice of coffee.  A few week's ago Ruy and I went to a green market in the town next to use and there was a coffee food truck there.  The coffee was great and we bought a bag of the beans.  Freshly ground Brasilian coffee is the best!! 


Now, for the card - 


The first thing I did was to print out the USA Cupcake digi stamp from Bugaboo Stamps.   They also have a Canadian Cupcake and both are on sale for $1 right now.  Yes, $1 US!!  

I trimmed the image to 3" x 4" and then I applied some white puffy paint to the cupcake.  I wanted it to look like it was white frosting.  Although this is a Brasilian brand, I am confident that there is something similar that you can find in the country you live in.  


Then I added some red, white and blue seed beads to the wet paint and, when it's dry, the beads will not fall out.  I put this aside to dry overnight.


Next, I cut a piece of red, white, and blue cardstock to fit the Sun Rays Quilted Card Panel die from Frantic Stamper and I applied double sided tape to the back.  This way it will be easier to adhere the pieces to the card front later.


Then I die cut the 3 pieces using my die cut machine. 


I cut an A2 card base of white cardstock and adhered the frame from the white cardstock.


Then I adhered one of the red pieces and then went around the whole card in a red, white, blue pattern until I glued in all the pieces.  


Then I colored in my image, adhered it to a piece of the blue cardstock, which I then adhered to the card front.  

But I wasn't happy.  So I printed out another image in the same size, colored in the flag again and one of the stars, cut them out and adhered them to the cupcake with foam tape.  The last thing I did was to adhere a few light blue crystals to the front.  


I'd love to know what you thought of this card.  Feel free to leave a comment below.  I answer all comments!  Also, please be sure to stop by my Deb's Blog and Celeste's Blog and show them some love too!!

I hope everyone has a great 4th of July in the USA and, please, stay safe!  Until next time -

Hugs from Brasil - 
Michael

Saturday, June 29, 2019

You Better......Werk That (Pineapple) Crown!!


Hello everyone!  As you guys know, I made a card the other day for Challenge No. 120 over on the If You Give A Crafter A Cookie Challenge Blog.  If you missed it, you can check it out HERE.  I had a lot of fun making some more cards with this fruit theme and wanted to share another one with you today.  

But, first, a little back story. 

I started to watch RuPaul's Drag Race a few weeks ago and fell in love with this show.  Not something I ever thought I would say.  LOL  One of RuPaul's catchphrases is "You Better Work" but he uses "work" with an "e" - like this "Werk".  While on Pinterest the other day a card popped up in my feed of a gold crown and the phrase "Work That Crown".  I immediately thought of a pineapple, since it also has a crown, and I wondered how I could "werk" this phrase into a card.  And today's card was born.   

I started with a top folding A2 card base of purple cardstock.  I cut a piece of Marigold Morning cardstock (Stampin Up/Retired), die cut it with a stitched inside scallop die, and then adhered the outside part to the card front.  The inside we will use later.   


Then I sized the pineapple digi image to about 2.25" x 4.5" and made the catchphrase "Werk That Crown" on the computer and printed them both out on white cardstock.


I placed the same stitched inside scallop die over the image and die cut it.  Now I have the inside section to use on the card front.


I colored the pineapple, adhered it to the card front using foam tape and then I used the Clear Wink of Stella pen on top of the pineapple to give it shimmer.


The last things I did to finish off the card was to die cut the phrase with a banner die I have, layered it on a piece of the same purple cardstock, and adhere it to the card front.  I also added some purple sequins on the front and a piece of white cardstock on the inside.  


After looking at this card in the morning I realized that the shimmer was not enough for a "crown".  So I added green Stickles to the crown.  Here's the final card.


I loved making this very tongue in cheek card and I hope you enjoyed it too.  I'd love to know what you think.  I might be back with another card or two related to the fruit challenge over on the If You Give A Crafter A Cookie Challenge Blog.  Until next time -

Hugs from Brasil - 


Michael

Friday, June 28, 2019

Happy Pride Heart Card - Show Your Pride or Your Support for the LGBT Community


Hello everyone!!  It's Pride weekend in a lot of cities around the world this weekend and I wanted to make a card to show support for my community.  Sadly, it's scary times right now - globally - for the LGBT community and I hope that the strides we have made in the past 50 years do not get removed or go away.  I truly believe that every human being is entitled to the same rights no matter your race, sexuality, or color of your skin.  I wish everyone felt this way.

Now, on to the card!! 

This idea for this card actually came from an ad that I saw of a black tank top with a rainbow heart in the center.  I decided to run with this idea and make a card.   

This is a great project because you don't need to have a heart die or banner die to make the card.  You can draw your own heart and cut it out and then you can cut strips of the colored cardstock for the heart.
Supplies Used:


Cardstock in red, orange, yellow, green, blue, purple, pink and white
A piece of white fun foam the size of the heart you will use
Nesting Heart Dies (QuicKutz/Retired)
Stitched Banner Die (Blueprints 1 MFT/Die-namics/Retired)
Die Cut Machine
Onyx Black Versafine Ink 


Step by Step:

With my die cut machine, I cut the heart die with white cardstock and a piece of white fun foam.  I then made a 6" square card base.  You will need to make a card base to fit the heart size you are using.  I cut one of each of the colors with the stitched banner die.  


I didn't know if the strips would fully cover the heart, so I used repositionable tape and temporarily adhered each of the strips.  I adhered the red and the pink first.  Then I went back with the orange, yellow, green, and blue.  When I got to the purple I realized I was not going to be able to cover the whole heart but I would be able to put a sentiment across to cover the open section.    


Next, I permanently adhered each of the strips on the heart, trimmed the excess, and glued the fun foam heart to the back.  I adhered a piece of decorative paper to the card front from the Echo Park/Coffee Collection (I think it was a perfect design) and then I adhered the heart on top.  


Next, I stamped the sentiment "you make my heart smile" on white cardstock, which I layered on a piece of orange cardstock with just a hint of a border, and then I adhered this to the card front with some pop dots on each end to keep it level with the heart. 

And here is the final card - 


I was debating about adding a few sequins here and there but, in the end, I felt that with all the colors this card didn't really need anything else.

I hope you enjoyed this card.  If you are going to any pride festivities this weekend, please stay safe!!  Feel free to let me know what you think of this design.  I'd love to know.  And, as usual, until next time - 


Hugs from Brasil - 

Michael

Thursday, June 27, 2019

If You Give A Crafter A Cookie Challenge No. 120 With A Pineapple


Hi everyone.  I have some exciting news to share with everyone.  I am now a Design Team member for the If You Give A Crafter A Cookie Challenge Blog.  My friend Debra has been on the team for some time now and she urged me to apply and I was asked to join the other talented people.  It's a fun blog where the inspiration for each challenge is based on a photo of a cookie.  And I do love cookies, and cake, and brownies....sorry, I digressed.  I hope you will start to follow them and play along with us.

The inspiration for my first project for the Design Team was this photo for Challenge No. 120 -


Having no images of fruit that I can think of, I jumped onto Etsy and found THESE adorable digi images of fruits to use, which also happen to be on sale for 50% right now!  

I started by printing out a sheet of the pineapples at 25% of their original size on to white cardstock.  Then I played around with some of my BIC colors and colored in two of them and then I fussy cut them out.   


I made a top folding A2 card base of white cardstock.  Then I cut a piece of Marigold Morning cardstock (Stampin Up/Retired), 4" x 5.25", and embbosed it with the Diamonds & Dots embossing folder (QuicKutz/Retired).  I felt that the criss/cross design of the folder went well with the pineapple. 

I fussy cut the pineapple, adhered it with pop dots to a piece of white cardstock, which I then adhered to a piece of orange cardstock, which i then adhered to the card front.


Next, I lightly applied Firefly and Yellow Stickles (Ranger) on the pineapple.  I also adhered 3 sequins to the card front (mainly because I had to cover up a spot that appeared out of nowhere).  LOL


While the Stickles were drying, I went online to research what the pineapple meant.  My friend Sue told me once and, even though I thought it meant "thanks", it really means "welcome" throughout the South and symbolizes friendship, hospitality and warmth.

I stamped a speech bubble with the word "welcome" (Balloon Talk/CTMH) using Onyx Black Versafine ink, heat embossed it with clear embossing powder, fussy cut it, and adhered it on the card front.


And here is the final card.


I loved making this card.   I have to admit, when I saw the cookie inspiration I was thinking "what the heck am I going to make using fruit?"  But it pushed me out of my comfort zone, which is what these card challenges are all about.  Actually, I was so inspired by this challenge that I made some other cards using the same digi stamp set and those will be posted in the next few days. 

I'd love to know what you thought of this card.  Feel free to leave a comment below.  I read and answer all the comments left for me.  And if you take part in Challenge No. 120 please let me know so I can check out your project.  Until next time -

Hugs from Brasil - 

Michael

Ahoy Matey!! Let's Get Nautical With Anthony's Paper Craft


Ahoy everyone!!  Summer is in full swing in the USA and other parts of the world and that means weekends on the beach, at the shore, and on a boat.  Not here.  We are in fall and it's a bit colder than normal for us.  But I still had fun making some nautical cards using this month's Stamp of the Month from Anthony's Paper Craft called "Nautical 1".  

Each Thursday in June, different members of the Design Team have posted a "nautical" project using this stamp set and today it's my turn.  Links to all the other Design Team projects are at the bottom of this post.  

To make this card, I used the following supplies - 


Nautical 1 stamp set (Anthony's Paper Craft); 
Faded Jeans distress ink (Ranger)
Ink blender or makeup brush (Amazon)
Dotted Die D-03-13 (Avery Elle)
Ocean Border Die (Impression Obsession/DIE101-D)
Flying Gulls Die (Memory Box/99734)

White, black, navy, and a light blue cardstock

Compass stencil (although it's a Brasilian brand, I am hoping you have something in your stash to use or you can just use the map paper without the stencil)
Step by Step:

I started with a 6" square card base of white cardstock and adhered a piece of navy blue cardstock to the front.  I also picked which design from the paper pad I wanted to use for my card front and I trimmed it down to a 5.75" square.


Next, I secured the stencil on top of the paper with painter's tape and I used one of the larger makeup brushes to blend the faded jeans distress ink over the stencil, making sure I got a nice dark color into the map.  I then adhered this to the card front.


Next, I did some die-cutting.  I cut a piece of the navy cardstock with the 2nd largest of the Stitched Circles dies and a piece of the light blue cardstock using the 3rd largest die.  I also cut each of the Ocean Borders from the same light blue cardstock and the Sea Birds from black cardstock.


To get the waves to have the same stitched border as the circle dies, I first distressed the edges with the faded jeans distress ink, then I adhered one of the waves on top of the light blue circle, and then the other wave a bit lower than the first.  I used a liquid glue but kept the glue away from the top of the waves so that I can slip the boats into then later on.


Then I put the die back on top, secured it with a piece of washi tape, and ran it through my die cut machine again so the stitching would match.  


Next, I stamped the lighthouse, the sailboat, and the compass from the Nautical 1 stamp set, fussy cut  and colored them.  I also die cut the two smallest fishtail dies from the Avery Elle set, the smallest out of white cardstock and the next size out of blue cardstock.  And I stamped the Ahoy on to the white tag.        


I colored the images and then adhered them on the card front.  I slipped the sailboat behind the waves, I applied pop dots behind the lighthouse and the compass, and I also die cut the 2nd largest fishtail die from blue cardstock and adhered the Ahoy piece on top.  The last thing I did was to adhere the gulls with two of them on the map as if they are flying away from the image.


Here is the final card- 


As promised, here is a list of all the other Design Team projects using this Nautical 1, Stamp of the Month.  I
hope you can find some time to stop by each one to see what they created and to show them some love! Mike (DezinesByEm)
Mary Kay (MKW Cards)
Debra (Meticulosity)
Gary (Crafter Dude Creations)
Christina (Stamprageous Crafts)
Anthony's Paper Craft

I hope you guys loved this card.  Let me know by leaving a comment below.  Feel free to follow my blog too.  As always, until next time - 


Hugs from Brasil - 

Michael

Tuesday, June 11, 2019

If You Give A Crafter A Cookie - SuperHero Card with Bugaboo Stamps


Hello everyone and Happy June!!  It's that time of the year again.  No, not summer!!  Father's Day!  And, just in time, Challenge 118 on the If You Give A Crafter A Cookie challenge blog, is all about "superheroes", of which many men in the dad role, are!    


My friend Debra, who is on the If You Give A Crafter design team, made an adorable card for this challenge (you can see it HERE) and I had to join her because this card was itching to get out of my head.  

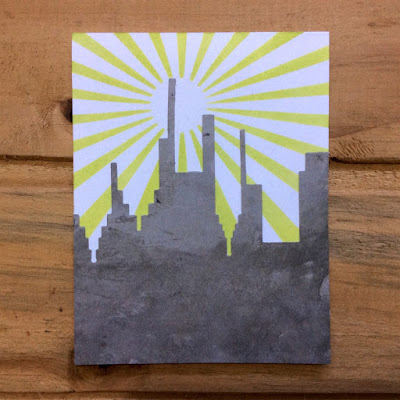
I started with a top folding A2 card base of which cardstock.  I adhered the Circle Rays stencil (StencilGirl Products) to the card front with painter's tape and, using a blending tool, I blended in squeezed lemonade distress ink.  I also found a (very old) die from QuicKutz called City Skyline, which I die cut using a piece of decorative paper from my stash.  


I then adhered the skyline to my card front and cut away the excess.


Next, I printed the Super Dad digi stamp from Bugaboo Stamps on to a piece of white cardstock at 80%.  I wanted something more than just coloring this guy so I went thru my stash and found some simple patterned designs and printed the image out on them too.     


I then fussy cut the different parts - the cape, the bodysuit, the letter "D", and the stars - using fine tip scissors from Martha Stewart.


I then adhered all the pieces to the main image.


And then I adhered Super Dad to the card front along with the two stars.  I made a sentiment on the computer using a free comic type font called Edson Comics, printed it out on to white cardstock, die cut it using a fishtail border die, and adhered it to the card front on the left.  


That's it!  I had a lot of fun making this card and realized, after making it, that you can use this card all year round.  Not just for Father's Day but for your dad's birthday, or you can change Dad to Dude and use for your uncle's birthday or any cool guy in your life. 

I'd love to know what you think!!  Think I need to make a few of these cards now.  Until next time - 


Hugs from Brasil - 

Michael

Make A Tall Giraffe Slimline Card Using An A2 Giraffe Stamp | Technique Junkies | Giraffe Love

  Hello all. I am in love with the new Giraffe Love stamp from Technique Junkies .  It's one of the new stamps in the April 2024 New St...