Friday, April 28, 2023

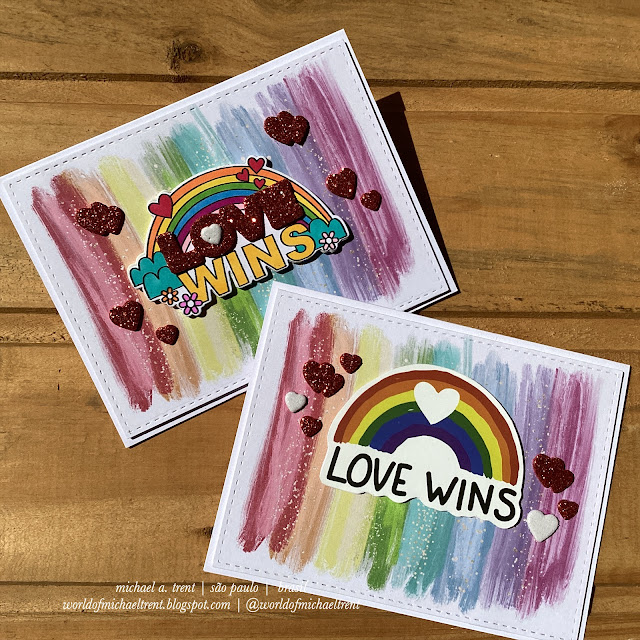
Equality For All Pride 2023 Makers Collaboration | Gay Pride 2023 | Love Wins


[If you are a maker who would like to join us for this Pride collab or, maybe, one of our Equality For All collabs, or be a Sponsor - just reach out to either myself or Misty.  The more voices, the louder the message.]

Welcome to Week 2 of the Equality For All / Pride 2023 Makers Collaboration with Misty aka The Jolly Fat Elf.  


I wanted to make two cards showing gay couples off to the Pride parade in the big city.  The idea was to use both of the Stamp Anniething stamps and dies that Misty sent me several weeks ago.  Sadly, the male couple stamp has decided to play hide and seek with me and will have to be used when I find it.  

Let me introduce you to Margaret and Angela.  They live in a small town surrounded by 3 rivers and a lot of nature.  Margaret is an art teacher in her local high school helping her students get in touch with their inner artist.  She is also on the school board and fights hard for all of the LGBTQIA+ students in the town.  Angela owns her own bakery in town where she makes the most delicious pastries and has a large selection of coffees from around the world.  The line on Saturday mornings is insane!  She is on the City Council and fights hard to make sure that the voices and concerns of the LGBTQIA+ community are heard. 

And, once a year, they take a long weekend and head to the big city to walk in the Pride parade.  

Nice story.  Right?  Well, I wanted to make a card to help them celebrate...and this is how I made it.

I started by making a top-folding A2 card using white cardstock.  Then I printed one of the Rainbow Digital Papers from Best Graphics Online on Etsy and adhered it to my card front.  I also die-cut a piece of watercolor paper using a 4" x 5.25" stitched rectangle die.  

I stamped Margaret and Angela  - Always By Your Side on a piece of white cardstock and colored it using some CIS Graf and Copic markers.  Then I die-cut the image using the matching Margaret and Angela Outline Die.  I love to color but don't have enough markers to do good color blending.  Especially for skin tones and hair.  But, I think I did okay.  

I used Jet Black Archival ink to stamp City Watercolors from Technique Junkies on the watercolor paper. And then, I used some small ink cubes from Gina K Designs, a water brush, and a clear block, to add some color to the Cityscape.  I smooshed some Powder Blue ink onto a clear block and then used a water brush to pick up some of the ink for the sky.  Next, I used Slate for the buildings.  And then Lemon Drop for the street light and some of the windows in the buildings to add some color.  


I adhered a piece of fun foam behind the watercolor paper and then to the card front.  Before I add the girls, I stamped the "always by your side" sentiment that came with the stamp set.  Then I added the girls.  I wanted to add them in the center but the top of the building looked like it was coming out of her head.  

And, to finish the card off, I added some stickles as eyeliner, to the shoes, and to the belts on each of the girls.  To be honest, I colored the right image very masc.  I think the yellow shirt should have been pink.  So I added glitter to gay it up.  LOL


Below is Misty's card, which she has over on her YouTube Channel.  I love what she did with Alec, another Stamp Anniething stamp.  Just click HERE to be taken to the video, which is over on the Stamp Anniething YouTube Channel.  


Hope you guys love these cards as much as we loved making them.  We'd love to have you follow us over on our social media pages, links are all below if you want to check us out.  

Me - World of Michael Trent

Misty - The Jolly Fat Elf

I'd love to know what think of our cards.  Please, leave a comment below.  Let's chat.  And, if you want to join us, just reach out.  Until next time...

Hugs from Brasil.

~Michael


Tuesday, April 25, 2023

Crafty Elves' Countdown to Christmas - April 2023 Edition


Hello everyone and welcome, once again, to a new Crafty Elves' Countdown to Christmas.  If this is your first time here, on the 25th of each month, the Crafty Elves [me, Debra of Meticulosity, Lisa of Life of a BZ Scrapper, and Misty of The Jolly Fat Elf] each share at least 1-holiday card idea.  We believe that if you make your holiday cards all year round, you won't be scrambling or stressing come November. 

Links to the other Crafty Elves' cards can be found at the end of this post.  Misty took this month off but she'll be back with us next month.  We hope. 

I have had the Santa's Clothesline die from Cottage Cutz - in my stash for some time now and I finally decided to use it by making a Mini Slimline.  I've never made one before but I thought it would be the perfect size for the clothesline.  Although the die is retired, you can still find it online in some stores.

I made my card base using red cardstock - 7" x 6" and scored in half on the 7" side.  I also cut a piece of white cardstock, 5.75" x 3.25".

I wanted some snow falling - since it's probably snowing up in the North Pole as Mrs. Claus is hanging Santa's clothes on the line.  I used some modeling paste with the Dylusions Snowflake Stencil on the piece of white cardstock and set it aside to dry.    

While it was drying, I die-cut the pieces of the Santa's Clothesline die using different colors of cardstock.

Once the paste was dry, I adhered the clothesline to the card front and also glued together the various pieces of clothing. 

I adhered all the pieces to the card front, on the clothesline, using the small brown clothespins. 

I adhered a piece of fun foam to the back and then I adhered this piece to my card front.  To finish off the card, I adhered a clear crystal to each of the bows, 3 red crystals to the card front, and some Frosted Lace Stickles to Santa's shorts.


Done!  It's more work than usual but I loved making this card.  I think I want to do it again but as a larger slimline, with more clothes, and a sentiment on the front.  Maybe in the future.  

Don't forget to check out what the other Crafty Elves have made this month.  You can find Lisa's card HERE and Debra's card HERE.  Misty has taken this month off.  I'd love to know what you think of this card.  Do you own this die?  Have you made a card using this die?  Let me know.  

Until next time, keep creating and hugs from Brasil!

~Michael 

Friday, April 21, 2023

Pride Collab 2023 with The Jolly Fat Elf | Equality For All | Gay Pride | Love Wins


Hello everyone and welcome to the Pride 2023 Makers Collaboration that I am doing with Misty a/k/a The Jolly Fat Elf.  We already started an "Equality For All" Makers Collaboration in the past and, since June is Gay Pride Month, we are hoping to post a card every Friday thru the end of June (Gay Pride Month) but, that's actually 11 weeks and that means that we have a lot of work ahead of us. 

Let's see what happens.  Links to Misty's social media pages to see her cards are at the end of this post.  

As an out and proud gay man - I am extremely supportive of the WHOLE LGBTQIA+ community.  I don't care what letter you use.  I may not fully understand every letter but I believe that you should be allowed to be whatever letter you want to be.  And I am really angry over what is happening in the USA with regard to LGBT rights!  We've come so far and now, because of some ass-backward uneducated "conservatives", the USA is going back in time.  As if these "conservatives" are not guilty of so much!

I also believe in "Equality For All".  I do not feel that anyone has the right to discriminate against another person for who they are, their skin color, what religion they practice, or what letter of the LGBT community they are.  If you don't like a person, don't talk to them.  Don't go to their church.  Don't go grab a beer in their gay bar.  Just be a decent human being!  Dammit!  

And Misty believes what I do.  She's not gay but she is a huge ally and supporter and a huge thank you to all of those that support our views.  

***Before I get to my first cards if YOU want to join us in either our "Gay Pride" Makers Collaboration or in a future "Equality For All" Makers Collaboration, leave a comment below, join our Facebook Group, or email me.  

We would love as many people and/or sponsors to join us.  Come help us spread the word and, if you are a sponsor, your products!    Our goal is to spark conversation and change. Our crafting community has done a poor job of creating products that exemplify diversity. If you are a brand that does and would like to work with us, please reach out to either Michael or me.  

For my first week, I made 2 cards using the rainbow and "love wins" theme.  

The first thing I was to print these Rainbow Brush Strokes, twite, on a piece of white cardstock, which I then die-cut using a 4" x 5.25" stitched rectangle die.  Then I cut two pieces of white fun foam to fit under them and I made two top-folding A2 cards using white cardstock.  


Next, using the Love Wins stamp set from Reverse Confetti, which was a surprise gift from Misty, I stamped and colored the rainbow / Love Wins image.  Then I used the Love Wins matching dies to cut the outline of the main image using white fun foam, and the word Love and all the hearts using red glitter fun foam.

Now, although Reverse Confetti is sadly, out of biz, the stamps and dies are still available at Frantic Stamper and Ellen Hutson.  

Then I put the card together, finishing the card off with a small white glitter heart in the center of the letter "O".


For my 2nd card, I went super simple.  I used one of the LGBT/Pride stickers that I had gotten from Ali Express weeks ago and, if you are curious, you can check out that video HERE.  I adhered it to a piece of white cardstock, fussy cut the sticker, and adhered it to the card front using foam tape.  

Then I die-cut the hearts from the Love Wins die set, as in the card above, using red and white glitter fun foam.  Then I adhered these to the card front.  


And there you have them!  Done!  Hope you guys love these as much as I seem to.  Don't forget to check out what Misty did. You can check out everything over on our social media links, which are below, and Misty also has a video over on the Stamp Anniething YouTube Channel.   

All of our social media pages are below if you would like to follow us.  

Me - World of Michael Trent

Misty - The Jolly Fat Elf

I'd love to know what you think of these cards.  Leave a comment below, if you could.  Until next time...

Hugs from Brasil.

~Michael

Saturday, April 15, 2023

| QKR Stampede "Anything Goes" Card Challenge | Birthday Card | Design Team Project |


Hello hello hello everyone!  I hope y'all are doing great.  Today I am sharing my Design Team project for the QKR Stampede Blog.  On the 1st and 15th of each month, QKR has an "Anything Goes" card challenge.  You can use one of their images - or not.  But, you can also win free digi images from them if your card is one of the winners.  Not bad!

Quick note: The QKR and Eureka brands have been sold and, at this time, are not available to purchase.  Once the new owner has her store up and running, I will update any images used here with current links.  So, check back if you love these images!  

For my project, I made a birthday card using the Happy Birthday with Balloons digital stamp from Eureka! Stamps (link will be updated soon). 

I printed the Happy Birthday with Balloons image on white cardstock in the size I wanted, which I then die-cut using a 3.75" x 5" stitched rectangle die from Pink & Main.  Next, I colored the image using a mixture of ultra fine-tip BIC Intensity Markers and a few alcohol markers from GRAF.


I made a top-folding A2 card using white cardstock and I layered my image on a piece of dark pink cardstock measuring 3 7/8" x 5 1/8" - just to give some contrast between the image and my background paper.  I also printed one of the papers from the Birthday Digital Paper from The Digi Rainbow on Etsy and die-cut a piece using a 4.25" x 5.5" stitched rectangle die from Pink & Main.


I adhered the digital paper I printed to my card front using double-sided tape.  Then I cut a piece of fun foam and adhered this to the back of the dark pink cardstock and then to the card front. 


To finish off the card - AND THIS IS TOTALLY OPTIONAL - I added Diamond Glaze on the balloons and set it aside to fully dry.  I love the shiny, glassy look of the balloons but, without the glaze, the card still rocks, and anyone you send it to will love it.  I promise!  


Here is the final card with the Diamond Glaze fully dry and waiting to be mailed off to someone.  


I hope you can find the time to check out what the Design Team has made and, remember, if you make and upload a card to the challenge, you might win some FREE digi stamps.  All the info is over on the QKR Stampede Challenge Blog.  Hope to see your creations over there.

Thanks for stopping by my blog today and, as always....until next time....

Hugs from Brasil.

~Michael


Friday, April 14, 2023

Yes, It's A Holiday | Look Up At The Sky Day | Rainbow Card


Hello everyone and welcome to a new Yes, It's A Holiday collaboration with my friends Debra (@djdavison814) and Lori (@mamakobs), and today we are celebrating National Look Up At The Sky Day!

According to National Today, the history behind today's holiday is vague.  Some believe it started in honor of Jack Borden, a former Boston newsman who quit his day job after looking at the sky for what he considered to be the first time.  He wanted others to see what he saw that day and founded For Spacious Skies, a nonprofit in the 1980s.  Interesting...there is much more about today's holiday and you can read all about it HERE.

I have to be honest, I had issues coming up with an idea for today's holiday.  I was thinking clouds...then a night sky...then astronauts...balloons...but my brain was just going in circles.  I decided to see if Google had any good "look up at the sky quotes" and one, in particular, jumped off the page.    

The quote was 

"Look up to the sky.
You'll never find rainbows if you're looking down."
~Charlie Chaplin. 

I knew I had to use it on the card. 


I went thru my paper stash looking for a good paper with rainbows on it.  I found 2 sheets from a Brasilian company called Scrap Goodies.  Sadly, this line has been discontinued. Then I made my slimline card base, 3 5/8" x 8 5/8" using white cardstock and I used a stitched slimline rectangle die to cut a piece of pink cardstock that I adhered to the card front. 


From the top of one of the sheets, I cut a piece 3.25" x 8.25", adhered it to a piece of fun foam, and then to the card front. 


Next, I fussy cut the same rainbow I used on my card front from the 2nd sheet of paper, added some foam tape behind it, and adhered it to the card front on top of the other rainbow.  I also typed up the quote on the computer, printed it on white cardstock, adhered it to a banner die, and adhered that to the card front.  And, lastly, I added some Frosted Lace Stickles around the clouds attached to the rainbow.


And here is the final card.  


I'm really happy with this card idea and plan on using the other rainbows and clouds from the papers on other projects.  Don't forget to check out what Debra and Lori made - over on their Instagram pages.  Links to all of our Instagram pages are below.  

Lori - @mamakobs

Thanks so much for stopping by my blog today!!  As much as I would love to go outside and look up at the sky, it's pouring.  So, please, go look up at the sky for me!  Until next time...

Hugs from Brasil!

~Michael

Saturday, April 1, 2023

QKR Stampede "Anything Goes" Challenge Blog | Happy Easter with a Bunch of Eggs


***Please note that right before this blog post went live, Stamp-On-It sold their stamp lines, including the QKR and Eureka digital stamps, and the links in this post will probably not work.  Once the new owner has the new website up and running, I will fix all the links in case you wish to buy these digis.   

Hello everyone!  It's the 1st of the month and that means that there is a new "Anything Goes" card challenge over on the QKR Stampede Challenge Blog.  


For my Design Team project, I decided to make one more Easter card because there is still time to make a few more.   

And, heck, these digi images are $2 each.  How can you go wrong?  Right?    

For this card, I used Bunch of Eggs for my main image and Happy Easter for the sentiment.  Both are digital stamps by Eureka! Stamps

I use Pages on my Mac with my digi stamps.  I imported both images to Pages on a card sized 4.5" x 5.5".  I print a slightly larger image allowing for the border and giving me a bit of room to die-cut the image.  I used Bunch of Eggs on the top and bottom of the card front and the Happy Easter sentiment in the center.  I printed this twice.  One of them I die-cut using a stitched rectangle die (Simon Says Stamp).  The other one I set aside to use later.    


I also made a top-folding A2 card using white cardstock to which I adhered a piece of decorative "Easter(ish)" paper.  I had to use yellow because if I use pink again I will go mad.  And, I already have an idea for the other part of the paper I used.  


Next, I colored in my card front using my GRAF alcohol markers. And, on the 2nd piece I printed, I colored in the images using the same colors and I fussy cut them out.  

I adhered a piece of white fun foam behind my full image and then to the card front.


Now, you can stop right here.  Maybe add some stickles or crystals and call it a day.  But, we can make it better! 

On the two fussy cut pieces, I added foam tape behind them and adhered these to the card front, making the card 3D(ish).


To finish off the card, I added some different colors of Stickles to the card front - to give some shimmer and shine - and a few crystals too.


Don't forget to check out the QKR Stampede Challenge, see what the Design Team made, and, remember, if you enter your own card you have the chance to win some FREE digis.  It's all over on the QKR Stampede Challenge Blog.

Thanks for stopping by the blog today.  Until next time...

Hugs from Brasil.

~Michael

Make A Tall Giraffe Slimline Card Using An A2 Giraffe Stamp | Technique Junkies | Giraffe Love

  Hello all. I am in love with the new Giraffe Love stamp from Technique Junkies .  It's one of the new stamps in the April 2024 New St...