Crafty Elves' Countdown to Christmas - January 2023 Edition

Hello everyone and welcome to the January 2023 edition of The Crafty Elves' Countdown to Christmas. If this is not your first time here, thanks for stopping by again. But, if this is your first time here, on the 25th of each month, the Crafty Elves - me (World of Michael Trent), Debra (Meticulosity), Lisa (Life of a BZScrapper), and Misty (The Jolly Fat Elf) - post ideas and creations to help spark or and inspire your Christmas and Holiday cardmaking.
And this year, 2023, we are kicking it off in style with our first Guest Crafty Elf - Chris Franco (Stamped Blessings) - who is a good friend of Debra's and she's a Close To My Heart Consultant (CTMH) consultant. When I lived in the states I loved CTMH stamps and I moved here with a boatload of sets. I still miss getting the new CTMH catalog, brewing a cuppa Joe, and slowly going thru it, folding down the corner of pages that had stamps I wanted to buy. And, for today's post, I decided to dust one of the Christmas sets off and use it.
Links to ALL of our social media pages are at the end of this post, and, if YOU would like to be a Guest Crafty Elf/Sponsor for one month, just reach out to one of us - in a comment or a message - because we would love to have you join us.
Now...let me show you how I made this card.
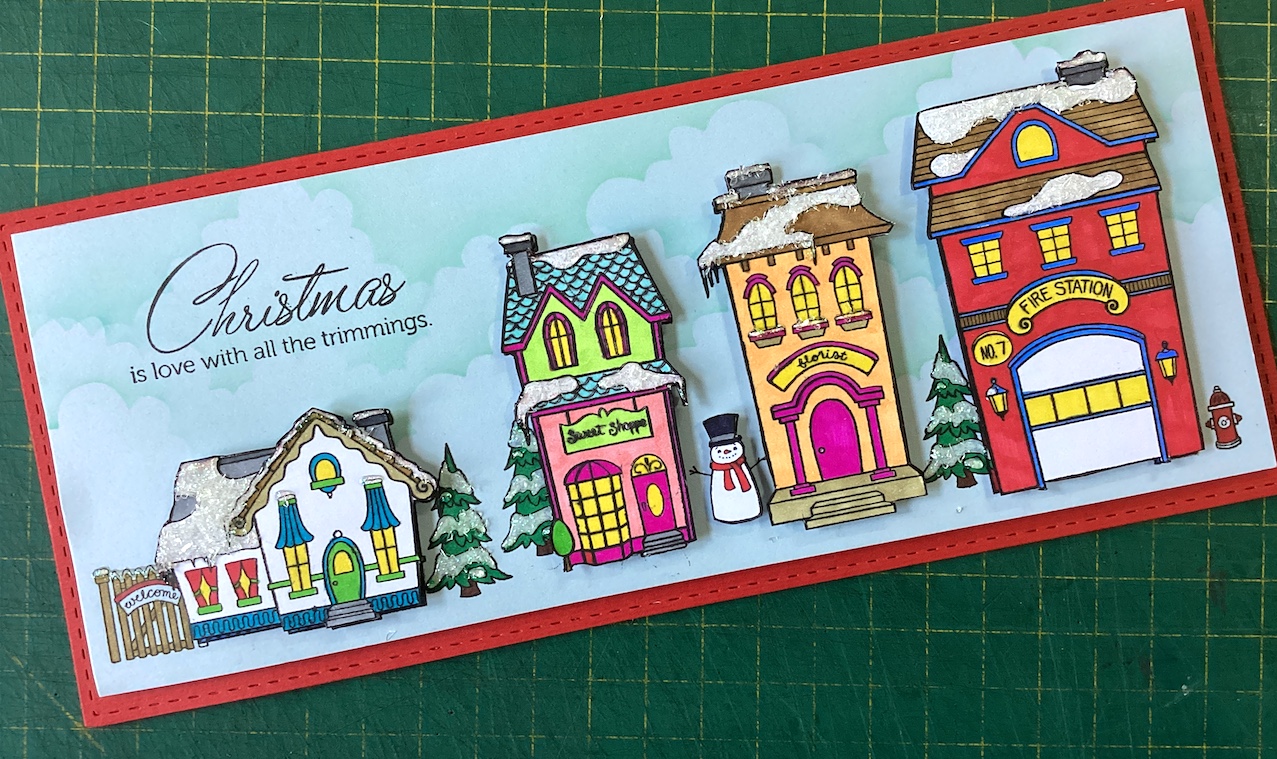
I began by cutting a piece of light blue cardstock, 3.25" x 8.25" and I placed the images from the set where I think I want them. I felt the light blue would give a sort of wintery feel rather than a stark white background. I wanted the house on the left side with the fence and some trees. Then the buildings with, maybe, trees between them?
I started by laying out the idea, below. Then I stamped JUST the fence and one of the trees on the left side.


Then I placed the house stamp down and stamped that over the fence and trees. And then I stamped another tree and the firehouse on the right side.


I placed the remaining buildings down and decided I wanted a tree on the left side of the firehouse and a snowman between the buildings. So, I removed the buildings and stamped just the tree and the snowman.


Then I placed the last two buildings - the Sweet Shop and the Florist - where I needed them and stamped them. I also stamped the 4 buildings on a piece of white cardstock to be colored and fussy cut.


Now..the cloud background.
I just wanted a hint of clouds in the background. So I grabbed one of the cloud-making stencils I have in my stash, Tumbled Glass Distress Ink, and a blender brush - and blended the clouds on the background. I wasn't worried about stenciling over the stamped buildings since I will be covering them anyway.

Next, I colored using Ultra Fine Tip BIC Intensity Markers. The best for images like this.
I also used a Brasilian product where the snowbanks are on the roofs, the trees, and the top of the fence. Then I sprinkled some Diamond Dust on top to give a snowy shimmer to the scene. I am sure Nuvo probably has something like this for you to use.
Once it was all dry, I added some foam tape to the back of each of the buildings.


Using white cardstock, I made my card base - 3 5/8" x 8 5/8". Then I die-cut a piece of red cardstock using the largest scalloped die from the Slim Stitched Rectangle Die Set by Pink Fresh Studio, which I adhered to the card front.
I cut a piece of fun foam and adhered it to the back of the light blue cardstock piece, which I then adhered to the card front.

Then I removed the tape backing on the foam tape behind each building and adhered them to the card front.
Almost done...
I am on the fence here - should I add some "snow" along the bottom to kind of ground the images or should I just leave it alone and hope I don't mess things up? Honestly, I should have done this a few steps back but...
OK...I added more of the "snow" along the bottom and set it aside to completely dry.


.jpeg)
.jpeg)

Love that you fussy cut the houses and laid them over all the other beautiful scenery! Really brought the whole thing together perfectly!! Such a great card Michael!!
ReplyDeleteWonderful coloring on the Christmas building scene and great use of the MISTI. I luv my MISTI.
ReplyDeleteMelissa
"Sunshine HoneyBee"
Love the dimension and colors! Great stamp set with these charming buildings! Awesome card!
ReplyDeleteI love this card! and you foamed the blue piece too? Double pop! :D I have been using those pens since I first heard you talk about them..I also use sharpies...but the point on the bics is better for tiny detail...I am so glad you mentioned them. Funny about the clouds and what the mind sees...I would have sworn you stenciled with some white at first glance, but the contrast with the tumbled glass makes it seem like white...bc our minds just assume clouds are white!
ReplyDeleteLove the dimension on your card, Michael!! A wonderful start to 2023!
ReplyDelete