Card No. 3 - November 2020 Crafty Elves Countdown To Christmas - Happy Hanukkah
Hello everyone. This is a more detailed step by step on how to make Card No. 3 (of 4) from the November 2020 Edition of the Crafty Elves Countdown to Christmas.
Links to the other 3 cards as well as the links to the other Crafty Elves' blog post can be found at the end of this post.
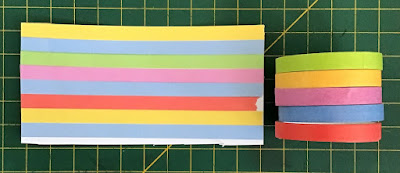
I wanted to make a super simple and fast card for Hanukkah and this idea was bouncing around in my head. A few weeks ago I received the Happy Hanukkah Script Die from Pretty Pink Posh. The week I got it, I also found a package of thin multi-colored washi tape here in the mall. And I wanted the two to get married.
I started by making a 6" x 6" card base from white cardstock. Using the Happy Hanukkah Collection from Photo Play Paper, I adhered one of the designs (Peace & Light) to the card front. Then I cut a piece of silver cardstock, 5.5" x 5.5", and adhered that in the center.
Then I cut another of the designs (Shine Bright), 5.25" x 5.25", adhered it to a piece of fun foam, and then to the card front.
Using a piece of scrap cardstock about the size of the die, I adhered strips of the washi. Each strip was a different color. Then I die cut the Happy Hanukkah Script Die.
Next, I placed the card into my Misti and then stamped the menorah from the Festival of Lights set from Anthony's Paper Craft. I know, I should have done this differently but I forgot to stamp the image before I adhered the paper down.
Then I colored the menorah using BIC Intensity markers. Each of the candles was made a nice bright color like typical menorah candles and I used a light gray on the menorah to make it look like aged silver. Then I adhered the Happy Hanukkah sentiment under the menorah.
Lastly, I added some Yellow Stickles to each of the flames on the candles as well as some small dots on the card using the Blue Pearl Pen by Viva Decor.
Debra - Meticulosity
Lisa - Life of a BZscrapper
Hugs from Brasil!
~Michael


.jpeg)
.jpeg)
Comments
Post a Comment