Sam The Surfing Duck
This project all started when I got an email from Gerda Steiner Designs asking people to download a free digi of a surfing duck, make something with it, and upload it to the Instagram Surf Challenge. Um....sure! Being in Brasil, without easy access to a stamp store, has made me embrace digi stamps a lot more than in the past. So I went HERE and downloaded the free Surfing Duck digi, below. Oh, I named him Sam, by the way. Sam the Surfing Duck!
I started with an A2 side folding white cardstock base. I cut a piece of navy blue cardstock, 4 1/4" x 5 1/2", which I adhered to the card front.
Then I cut a piece of light blue cardstock, 4" x 5 1/4", placed the "Shine" stencil by Memory Box over the cardstock, and sprayed it with Lemon Zest Dylusions ink spray.
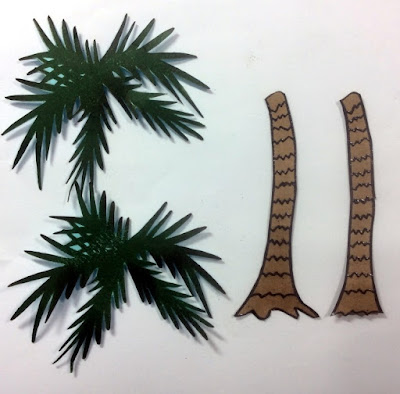
For the palm trees I used a set called "island2visit" by The Stamps of Life. I wanted the palm trees to be taller than the stamp allowed so I stamped and embossed the truck, twice, and then I cut a piece off one of the trunks to glue at the top of the other. I did this twice since I wanted two trees. I also stamped the leaves stamp twice and had my Scan N Cut cut them out.
Then I adhered one of the trees onto the card front as well as the leaves at the top.
For the 2nd tree, I put some pop dots on the back of the trunk and the leaves and adhered this to the card front but on the left side of the first tree.
I wanted some sand on the bottom of the card so I dug through my stash and found a jar of Malibu Beach sand with glue from MuddPuddles, which I think is out of business now, and applied some of this to the bottom of the card front.
Then I colored in the Sam the Surfing Duck digi with some Copic markers, added a few dots and dashes to his surfboard to give it a slight design, and applied glossy accents to his sunglasses and the surfboard.
After it was dry I adhered Sam the Surfing Duck next to the trees.
The last step was to adhere this to the card front. Done!! Here is a close up of Sam -
I hope you guys enjoyed this quirky little card. It was fun to make. If you want to make something too, click on the link at the top to get the digi or sign up for the newsletter on the blog HERE!
Hugs from Brasil -
Michael


.jpeg)
.jpeg)
This is so cute...love it...tfs
ReplyDeleteThanks Lois!!
DeleteI love this! It's so cute and Sam is a perfect name for Mr. ducky. How did you make the glasses and surfboard so glossy looking??
ReplyDeleteThanks Birgit! I used glossy accents on both the glasses and the surfboard.
DeleteWhat a great card! Love all of the details you put into it. Guaranteed to brighten anyone's day!
ReplyDeleteThanks so much!! Glad you liked the card.
DeleteFabulous, as always!
ReplyDeleteThanks Estrella!!!
DeleteSo fun!!
ReplyDeleteThanks HJ! Thanks for stopping by the blog again.
Delete