Woodblock Wednesday - Hanko Designs - Butterfly Fence
Hello everyone and welcome to "Woodblock Wednesday" - the new day of the week to dust off and ink up those long-forgotten woodblock stamps. My friend Amy rebooted this idea of hers and I want to play along. Since moving here with hundreds of woodblock rubber stamps that have never been used or loved, I decided that it was time to start inking them up.
If you would also like to play along, the graphic Amy created is below, and, remember to use the hashtags #woodblockwednesday and #woodblockstamps (and any other hashtags you feel are relevant). Also, remember to link up on her blog, which you can find HERE.
When I started this "addiction", er, I mean "hobby", there were no clear stamps. Or digital stamps. There was no Etsy. Just red rubber stamps on wood blocks. And, when I moved here, all my stamps came along with me for the ride. Even if I never used them in the states, I "knew" I would use them in Brasil. LOL
8-10 years later, let's get using them!
While cleaning recently, I found a beautiful butterfly stamp (from 2007) called Butterfly Fence from Hanko Designs that I bought at The Ink Pad - YEARS AGO. Hanko is still in business and making stamps but, sadly, they no longer sell this image. And, sadly, The Ink Pad is no longer in business. But I wanted to use it.
I started by making an A2 card from black cardstock. I cut another piece of black cardstock, 4.25" x 5.5", using a stitched rectangle die, which I then embossed with an embossing folder in my stash. Sadly, I have no idea who makes the folder but the design matched the design in the stamp perfectly - not that you can see much of it.
Then I used another stitched rectangle die, 4" x 5.25", to cut 2 pieces of white cardstock.
I adhered the piece of embossed black cardstock to my card front and one of the white pieces to the inside of the card.
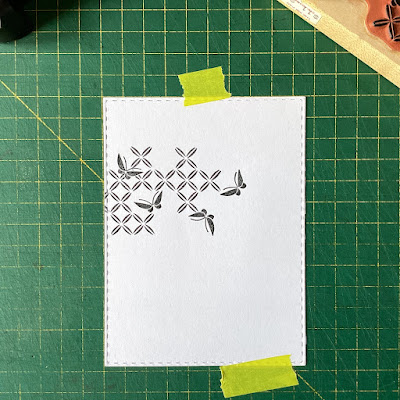
Using the other piece of stitched white cardstock, and a stamp positioner, I stamped the image with some of it off the cardstock.
Then I positioned my image where I wanted it and stamped it again to the right of the first image.
I decided to use one of the quotes from the Small Talk Sticker pack from Tim Holtz. I cut it, layered it on a piece of black cardstock, then to the card front.
Now I am done! I made a 2nd card, this one horizontal. Both are below.
I hope you have enjoyed this little journey back in time with a woodblock stamp. Are you playing along? Let me know and leave a comment below. I'd love to see what you make.
Until next time...
Hugs from Brasil!
~Michael


.jpeg)
.jpeg)
So beautiful!!
ReplyDelete