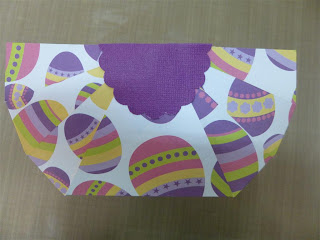
With Easter coming up, I wanted to share a very easy basket to make using the Metric Scor-Pal, 1 sheet of scrapbook paper, and 1 piece of coordinating solid paper. This basket is not just for Easter - use this tutorial to make baskets at any time of the year.
I originally saw this basket done on the Scor-Pal blog. I have re-done it here - in metric measurements - and with changes to the handle. Click HERE to see the original project on the Scor-Pal blog, in American measurements.
And here is a link to a video I made a few weeks ago making the basket - HERE.
Supplies Used:
Metric Scor-Pal and cutting matAnd here is a link to a video I made a few weeks ago making the basket - HERE.
Supplies Used:
1 sheet of Easter scrapbook paper (Oficina do Papel)
1 sheet of coordinating solid paper
Oval Punch
Doily Lace Trim Punch
Corner Rounder Punch
4 Brads
Ruler
Craft Knife
Double Sided Tape or Glue Stick
Pen or Pencil
Paper Cutter
Step by Step:
1. Trim your Easter paper to 27cm x 27cm.
2. Place it on the Scor-Pal and score - from top to bottom - at the 9 cm and 18 cm marks. Turn the paper 90 degrees and score again - from top to bottom - at the 9 cm and 18 cm marks. Your paper will have 9 boxes, 9 cm x 9 cm each box.
3. Place paper on Scor-Pal cutting mat. Using a ruler and an X-Acto Knife, make a cut from the top of the paper ONLY TO THE FIRST SCORE LINE - at the 3 cm, 6 cm, 9 cm, 18 cm, 21 cm, and 24 cm lines. Turn the paper 180 degrees and cut again at the same points - again ONLY TO THE FIRST SCORE LINE.
{your paper will look like this}
4. Bend back the two end strips and the middle box. Lay your ruler across the other 4 strips and cut 1 cm off the ends. Turn paper around and do the same on the other side.
{your paper will look like this}
5. Find the center of the middle square and mark a dot with a pen. Lay your ruler from the dot to one of the corners and trim. Do it again with the other corner. Turn your paper and do the same for the other side.
{your paper will look like this}
6. Place double sided tape or glue on all the strips - except one of the end ones.
7. Adhere the two end strips together, overlapping them about 2 cms. Continue with each of the other strips, alternating between sides.
8. Adhere tape or glue to the tip of the triangle piece and adhere over the strips. Wrap the tip of the strip over the top. Then do the other side.
9. Using the scallop punch, punch out two pieces from the solid paper. Lay them in the Scor-pal and score down the center. Fold in half.
10. Using a glue stick, glue each of the scallop pieces to the basket so that they cover where all the sides met.
11. Using the decorative edge punch and the solid paper, punch a strip the length you want your handle. Then cut a strip from the Easter paper you used for the basket, the same width and length as the solid strip. Use a glue stick and glue the solid strip to the Easter strip.
12. Trim the corners of the handle with the corner rounder.
13. Using double sided tape, or a glue stick, glue each side of the handle to the basket.
14. Using an awl or long reach hole punch, make two small holes in the handle and insert the brads. This is not only decorative to the basket but will also help keep it sturdy.
Now fill the basket with chocolate, and Easter Egg, and other little gifts and give as a present!!
Hope you enjoyed this tutorial!!
~Michael
.JPG)
.JPG)
.JPG)
.JPG)
.JPG)
.JPG)
.JPG)
.JPG)
.JPG)
.JPG)
.JPG)
.JPG)
.JPG)
.JPG)

.JPG)
.JPG)
.JPG)
.JPG)
.JPG)
.JPG)
.JPG)
.JPG)
.JPG)
.JPG)

.JPG)
.JPG)
.JPG)
.JPG)
.JPG)
.JPG)
.JPG)
.JPG)

.jpeg)
